|
<< Click to Display Table of Contents >> User Management |
  
|
|
<< Click to Display Table of Contents >> User Management |
|
Management of users with access to Peer Management Center's web interface can be performed through either the Peer Management Center's rich client, or through an admin account logged into the web interface.
To access the User Management configuration page, navigate to the Window menu, select Preferences, then select User Management from the tree on the left. The following will be displayed:
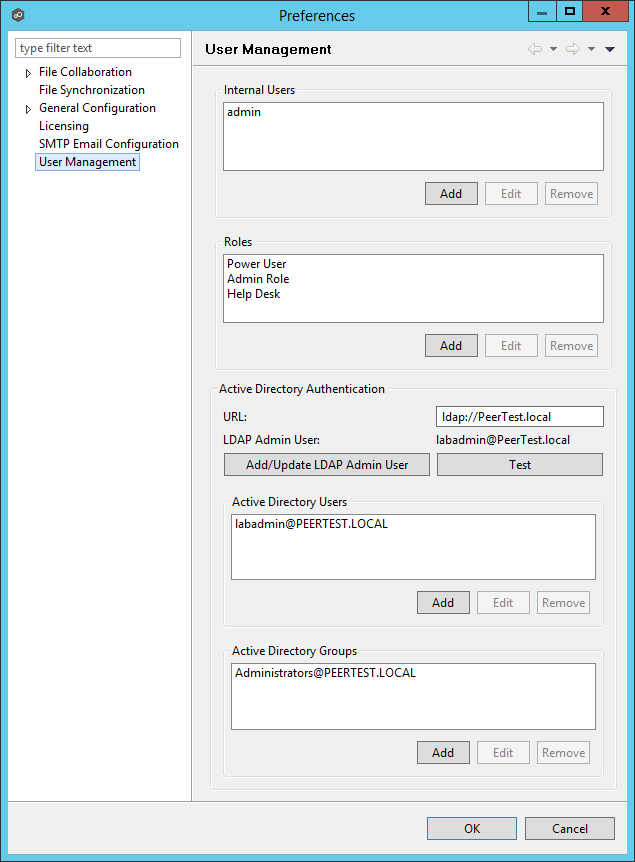
From this screen, you can add, edit, and remove internal user accounts, roles, and active directory users and groups.
Adding an internal account requires a username, a password, an email address, and a selected role. For more details on the available roles, see the How to Use section. Once an account has been created, it's username, password, email address and role can all be changed. The default admin user account password is password.
Roles define user permissions to access and edit resources in the Web Interface. There are three predefined roles with specific set of permissions: Power User, Admin Role, and Help Desk. To create a custom role or to edit a role click the User Management > Add or Edit button in the Roles section. To delete a role, select the role from the User Management > Roles section, then click Remove. Adding a custom role requires a name, display name, description and base role. Roles can also be assigned existing Tags to define the resources users with that role can view and edit. The following table outlines the Hub resources that each role can edit and view:
|
Power User |
Admin Role |
Help Desk |
Tag Resources Dialog |
|
Edit |
|
PeerSync Summary View |
Edit |
Edit |
Edit |
PeerSync Job Stats View Part |
Edit |
Edit |
|
Memory Dump Action |
Edit |
Edit |
|
Advisory Alert View |
Edit |
Edit |
|
Runtime Summary Interface |
Edit |
Edit |
View Only |
Permission Mode |
Edit |
Edit |
|
Status Agent Tree View |
View Only |
Edit |
|
Session View |
Edit |
Edit |
View Only |
Peerlet View |
Edit |
Edit |
View Only |
Preferences |
|
Edit |
|
Broker Statistics Action |
Edit |
Edit |
|
Hub Alert View |
Edit |
Edit |
|
PeerSync Configuration Interface |
Edit |
Edit |
View Only |
PeerSync Job Stats View |
Edit |
Edit |
Edit |
Event Analyzer Configuration Interface |
Edit |
Edit |
|
Collaboration Summary View |
Edit |
Edit |
|
PeerSync Update Log View |
Edit |
Edit |
Edit |
PeerSync Add Log View |
Edit |
Edit |
Edit |
PeerSync File Conflict View |
Edit |
Edit |
Edit |
PeerSync Runtime Summary Interface |
Edit |
Edit |
View Only |
Folder Analyzer View |
Edit |
Edit |
View Only |
Hub Save All |
Edit |
Edit |
|
PeerSync Participant View |
Edit |
Edit |
|
New Peerlet Action |
|
Edit |
|
File Conflict View |
Edit |
Edit |
Edit |
Configuration Interface |
Edit |
Edit |
|
Hub View Progress |
Edit |
Edit |
|
PeerSync Advisory Alert View |
Edit |
Edit |
|
Event Analyzer Validation View |
Edit |
Edit |
View Only |
Expression Info Dialog |
Edit |
Edit |
|
Hub Refresh Perspective |
Edit |
Edit |
|
Event Analyzer Runtime Summary Interface |
Edit |
Edit |
View Only |
Peerlet Alert View |
Edit |
Edit |
|
Log Dump Action |
Edit |
Edit |
|
Event Log View |
Edit |
Edit |
|
PeerSync Messages Log View |
Edit |
Edit |
Edit |
Event Analyzer Participant view |
Edit |
Edit |
|
Event Analyzer Log View |
Edit |
Edit |
View Only |
PeerSync Delete Log View |
Edit |
Edit |
Edit |
Thread Dump Action |
Edit |
Edit |
|
Participant View |
Edit |
Edit |
|
Hub Download Agent |
Edit |
Edit |
|
PeerSync Event Log View |
Edit |
Edit |
|
File Sync Advisory Alert View |
Edit |
Edit |
|
Expression List Dialog |
Edit |
Edit |
|
Active Directory Authentication
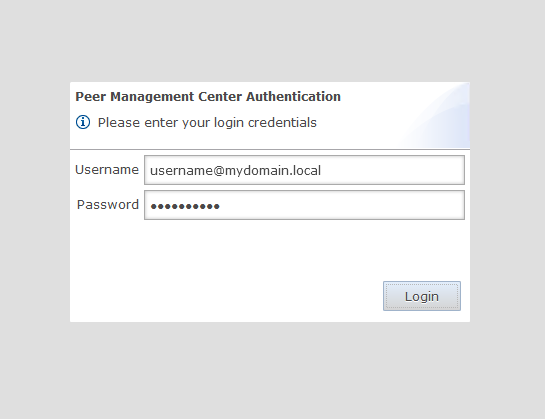
In addition to Internal Users, the Peer Management Center also provides Active Directory user and group authentication. To configure Active Directory Authentication, provide the URL of the LDAP server on the network in the format 'ldap://MYDOMAIN.LOCAL' or 'ldaps://MYDOMAIN.LOCAL'. Next, add an Active Directory user or group by clicking on the User Management > Active Directory Users / Active Directory Groups > Add button. The configuration dialog will require the Domain, Username or Group, and the Role. To delete an Active Directory User or Group, click the User Management > Active Directory Users / Active Directory Groups > Remove button.
Note: Active Directory users and groups are saved in the following format: 'Username@MYDOMAIN.LOCAL'. Use this format to log into the Peer Management Center's web interface: