Managing Active Directory users involves:
•Adding an Active Directory User or Group
•Editing an Active Directory User or Group
•Deleting an Active Directory User or Group
Adding an Active Directory User or Group
To add Active Directory users and groups to Peer Management Center, follow these steps:
1.From the Window menu, select Preferences.
2.Select User Management from the navigation tree.
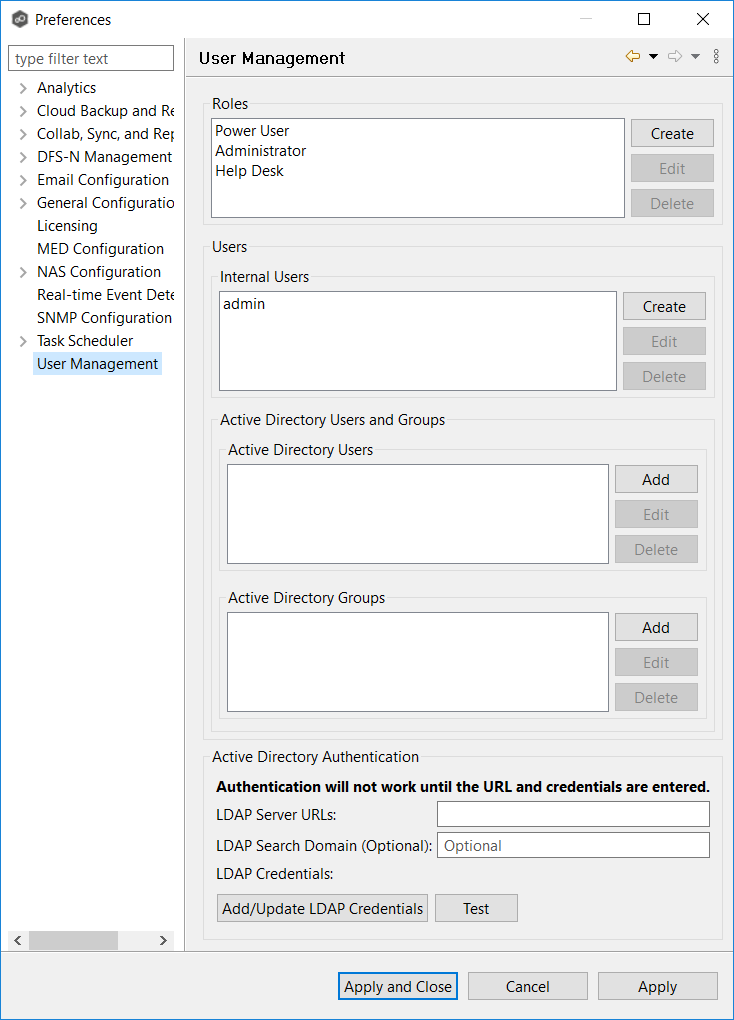
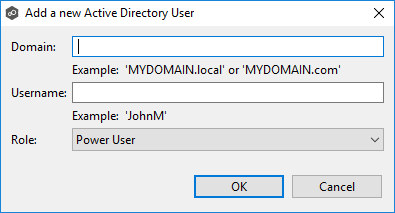
3.Add an Active Directory user or group by clicking the appropriate Add button.
4.Enter the information required in the dialog that appears:
•For an individual user, enter the domain name, user name, and select a role.
•For a user group, enter the domain name, group name, and select a role.
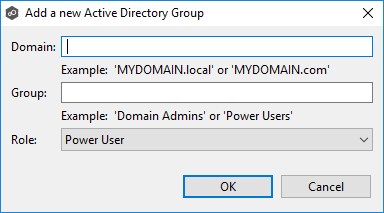
Directory users and groups are saved in the following format: username@mydomain.local
5.Click OK.
The added user or group appears in the list of Active Directory users or groups.
6.Click OK.
Editing an Active Directory User or Group
To edit an Active Directory user or group:
1.From the Window menu, select Preferences.
2.Select User Management from the navigation tree.
3.Select the AD user or group from the list of AD users or groups.
4.Click Edit.
5.Make the changes.
6.Click OK.
Deleting an Active Directory User or Group
If you delete an Active Directory user or group from Peer Management Center, that user or group will no longer have access to Peer Management Center through the web client. However, deleting the AD user or group from Peer Management Center does not delete that user or group from the Active Directory.
To delete an Active Directory user or group from Peer Management Center:
1.From the Window menu, select Preferences.
2.Select User Management from the navigation tree.
3.Select the AD user or group from the list of AD users or groups.
4.Click Delete.
5.Confirm that you want to delete the user or group.
6.Click OK.