The Update Health Checker page is where you specify where the Health Checker was installed and specify the types of files that Health Checker uses as test files. In addition, you specify which jobs Health Checker should monitor, based on job state.
To configure the Health Checker:
1.In the Path to Health Checker Configuration field, enter the path to the workspace subfolder under the Health Checker installation folder.
Note: If Health Checker is installed on an external server, you must enter the path in UNC format.
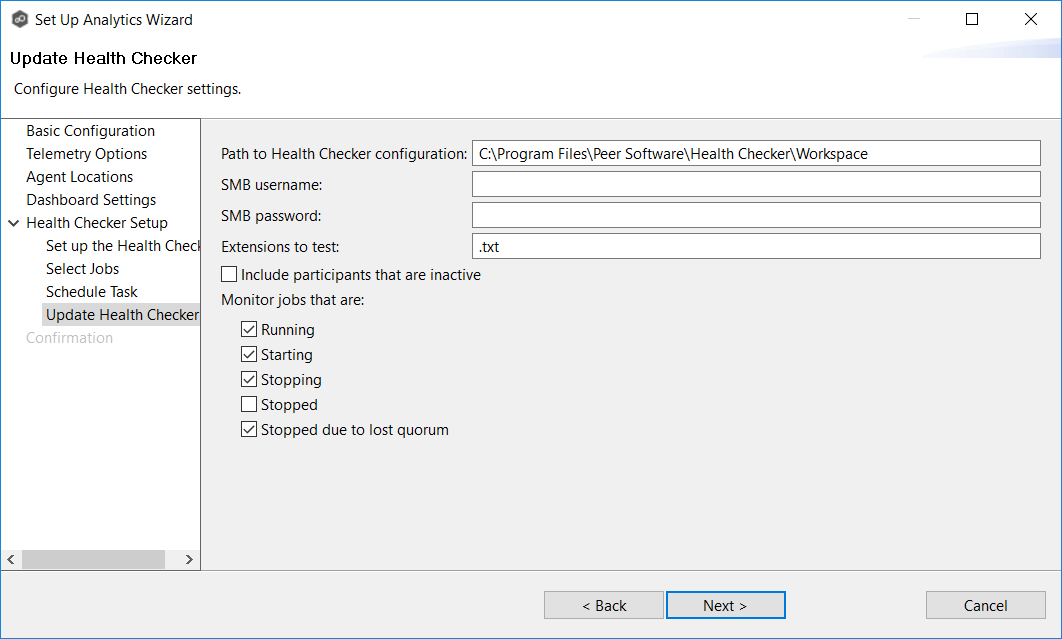
2.In the SMB Username field, enter the user name if the server hosting the Health Checker requires account credentials. In most cases, a locally installed Health Checker will not need a user name.
3.in the SMB Password field, enter the password if the server hosting the Health Checker requires account credentials. In most cases, a locally installed Health Checker will not need a password.
4.In the Extensions to Test field, enter the extensions for the file types that you want Health Checker to monitor. Separate the extensions with a semicolon.
5.Select the Include Participants that are inactive checkbox if you want the Health Checker to monitor inactive participants.
6.In the Monitor jobs that are section, select which job states should be included in Health Checker monitoring.
We recommend checking all but the Stopped category. The Stopped category includes jobs that are stopped for any reason other than a quorum lost. For example, if you have manually stopped a job, you may not want Health Checker monitoring it.
7.Click Next.
The Confirmation page appears.