The Agent Locations page appears only if you selected the Include Agent Locations option on the previous wizard page.
The Agent Locations page allows you to set location details for each Agent for use with dashboard maps. If you do not want to display Agent locations on dashboard maps, you do not need enter data in this page.
If an Agent's location has already been set through its Agent Configuration, those values will automatically appear on this page.
1.For each Agent that you want to appear on a map, enter the following information:
•Location - Enter the city, state, and country of where the Agent server is installed.
•Longitude - Enter the longitude of where the Agent server is installed.
•Latitude - Enter the longitude of where the Agent server is installed.
Agents do not automatically self-detect their locations. You can look up location coordinates using free online geographic tools such as https://www.latlong.net/ or by using Google Maps.
To use Google Maps to look up coordinates
(a) Open Google Maps, navigate to the Agent server's location and right-click this location.
(b) On the menu that appears, click the coordinates (the first item in the menu).
The coordinates are automatically copied to the Clipboard.
(c) Paste the coordinates into a text editor window (such as Notepad).
(d) Paste each coordinate into the proper coordinate field.
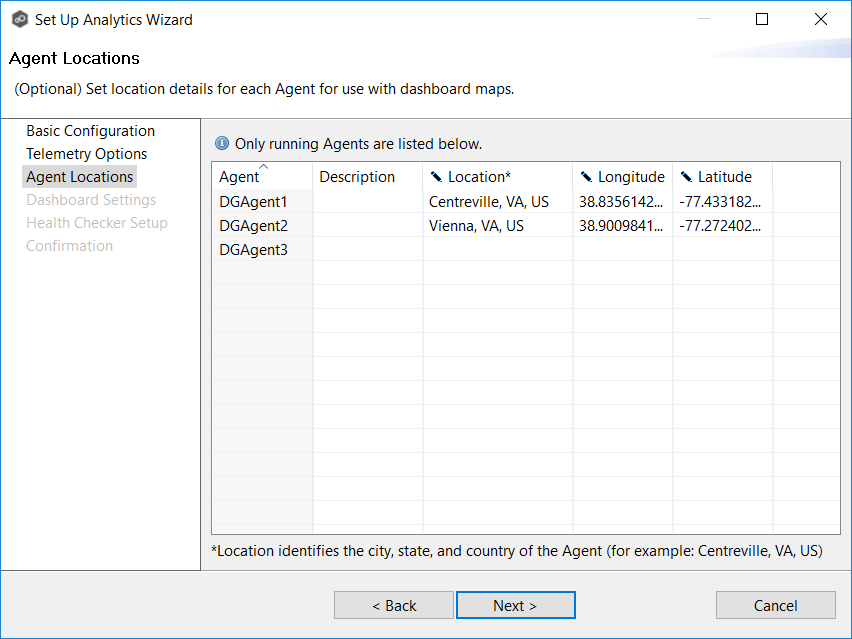
Note: The Description column is read-only. Its value is set through Microsoft Windows.
2.Click Next.
The Dashboard Settings page appears.