Managing internal users involves:
To add an internal user, follow these steps:
1.From the Window menu, select Preferences.
2.Select User Management from the navigation tree.
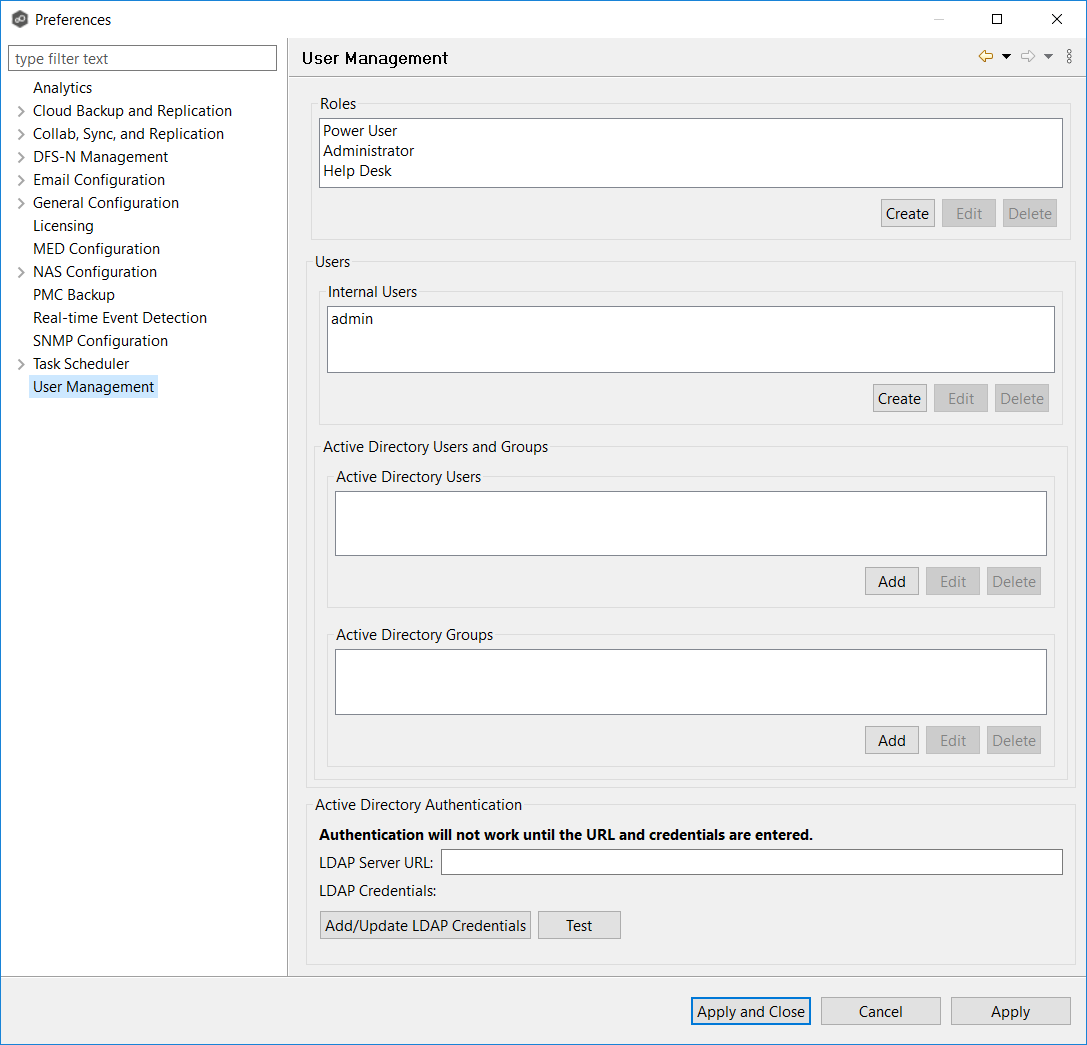
3.Select the Create button for Internal Users.
The New Internal User dialog appears.
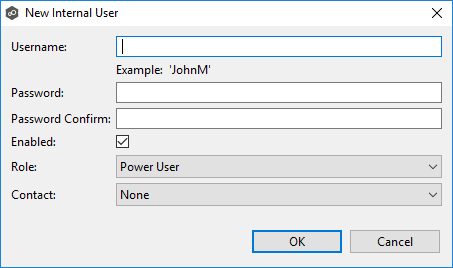
4.Enter the following information.
•Username: The username can contain letters, numbers, and spaces; it cannot contain special characters. The minimum number of characters is 6; the maximum number of characters is 20.
•Password: The minimum number of characters is 6; the maximum number of characters is 20. The password cannot be the same as the username.
•Password Confirm: Re-enter the password you entered.
•Enabled: Select this checkbox if you want to enable this user to access Peer Management Center. You can enable or disable the user at a later date by editing the user.
•Role: Select the web role you want to assign to the user. It can be a standard role or a custom role. For more details on the available roles, see Web Roles
•Contact: Select the user's email address from the drop-down list. If the user's email address does not appear in the list, you can add it to Contacts in the Email Configuration in Preferences.
5.Click OK.
The new user appears in the list of internal users on the User Management page.
6.Click Apply and Close or Apply.
Editing an Internal User
Once an internal user has been created, its user name, password, email address, and web role can all be changed.
Note: The default admin user cannot be renamed, nor can its role be changed. However, you should change the default password for the default admin user.
To edit an internal user from Peer Management Center:
1.From the Window menu, select Preferences.
2.Select User Management from the navigation tree.
3.Select the user from the list of internal users.
4.Click Edit.
5.Make the changes in the Edit User Information dialog.
6.Click OK.
7.Click Apply and Close or Apply.
Deleting an Internal User
Once the account of an internal user is deleted, that user can no longer access Peer Management Center through the web client.
Note: The default admin user cannot be deleted.
To delete an Active Directory user or group from Peer Management Center:
1.From the Window menu, select Preferences.
2.Select User Management from the navigation tree.
3.Select the user from the list of internal users.
4.Click Delete.
5.Click OK in the Remove User dialog.
6.Click Apply and Close or Apply.