When you create a DSU-enabled job, you specify a volume policy for an edge participant. A volume policy specifies how much of the available space on the volume monitored by the edge participant to assign for local (hydrated) files. This space is referred to as a cache. The volume refers to the drive letter of the path set on the Path page of the wizard (for example, if the participant is configured to monitor D:\Data, the volume policy for this participant would apply to the D volume).
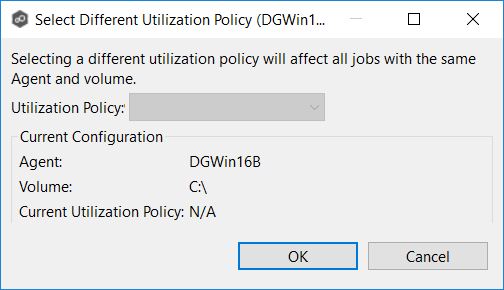
If the Agent you selected is already being used as an edge participant in another job utilizing DSU, the existing volume policy will be displayed on this page. You can edit the existing volume policy; however, be aware that any modifications to the volume policy will be applied to every other job that use this Agent as an edge participant and "touch" the same volume.
From this page, you can edit and delete volume policies. However, note that:
•Any changes made to a volume will not be applied to a running job until the job is restarted.
•You cannot delete a volume policy while it is being used by an edge participant.
To edit a volume policy:
1.Select Preferences from the Window menu.
2.Expand Collab, Sync, and Replication in the navigation tree, and then select Dynamic Storage Utilization.
3.Select Volume Policies in the navigation tree.
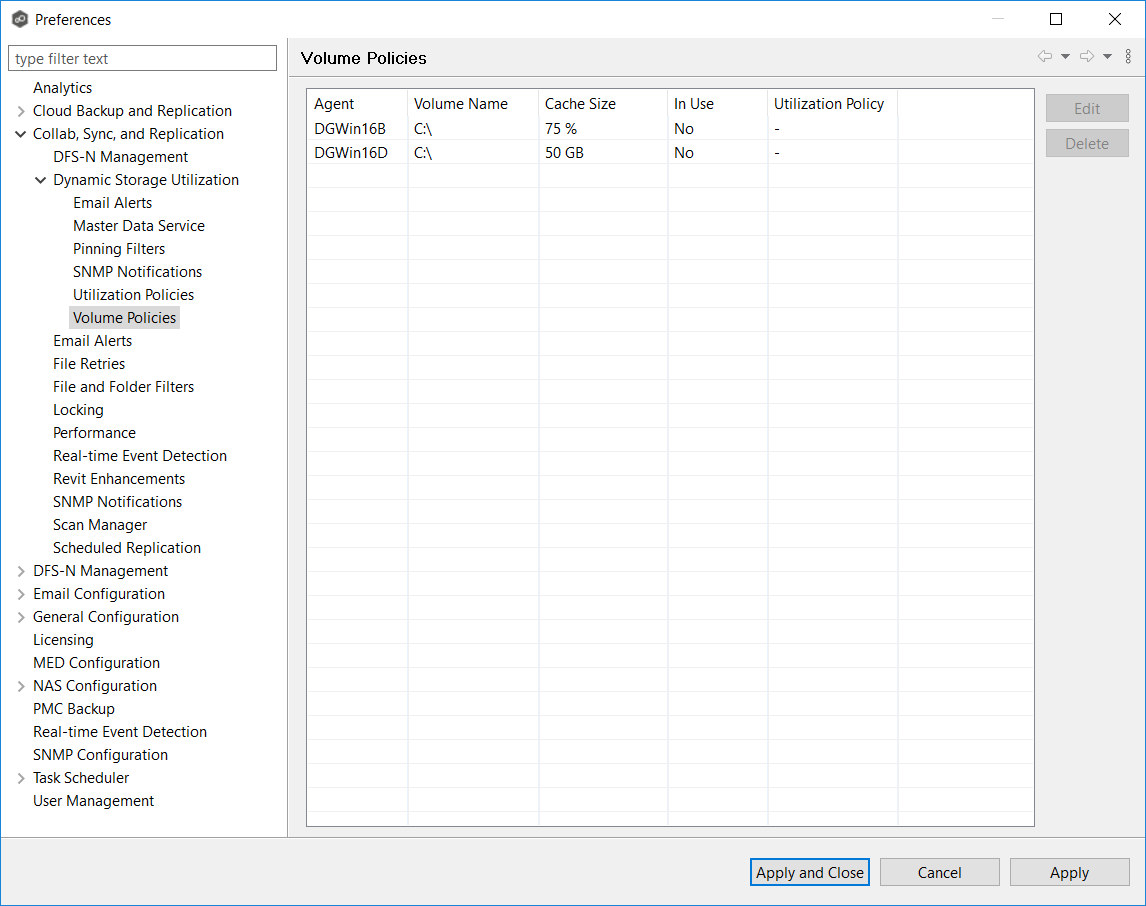
Any existing volume policies are listed in the Volume Policies table.
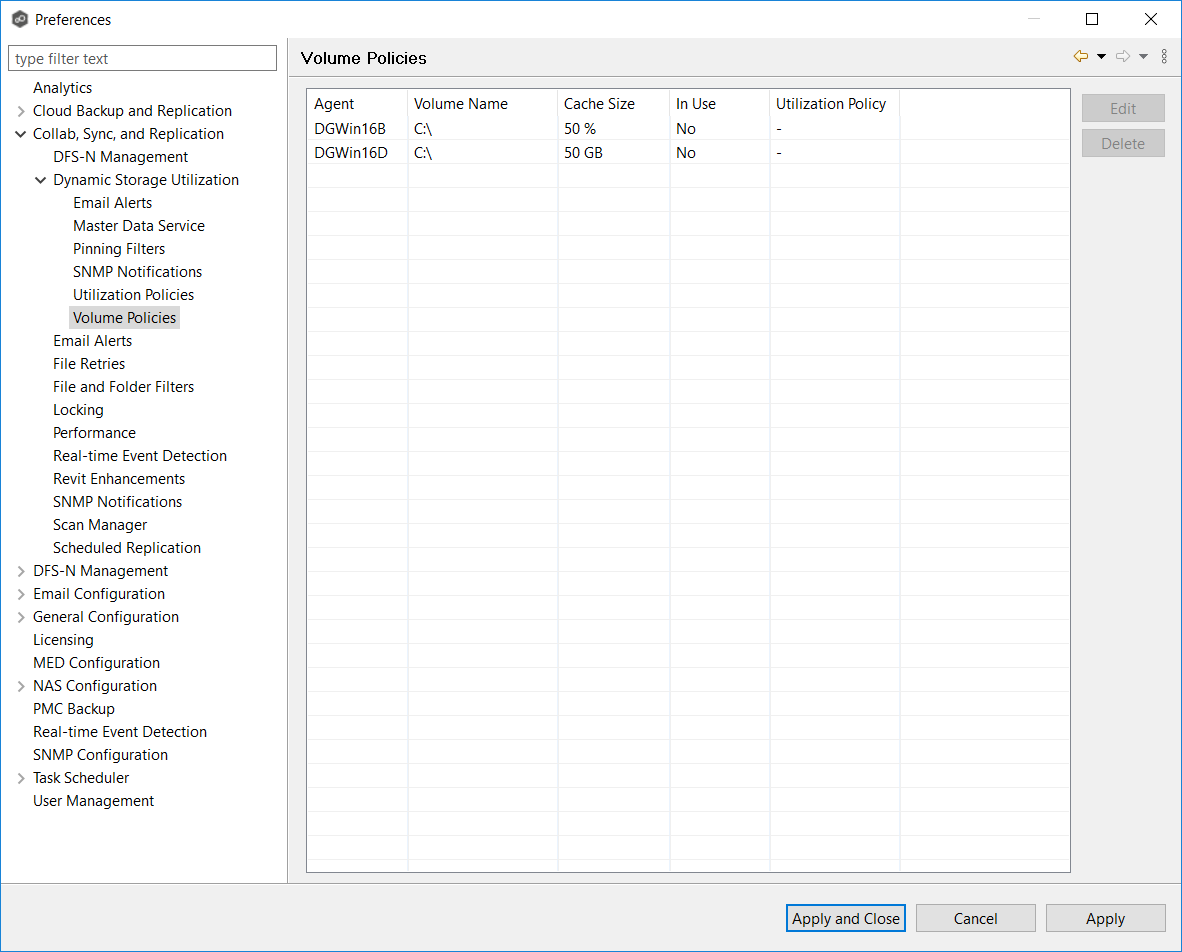
4.Select the policy you want to modify, and then click Edit.
5.If you have created a DSU email alert or an SNMP notification but not saved it, you will be prompted to save it.
6.If you selected a policy currently being used in a job, the In Use Configuration message appears.
7.Click OK to close the dialog.
The Edit Volume Policy dialog appears.
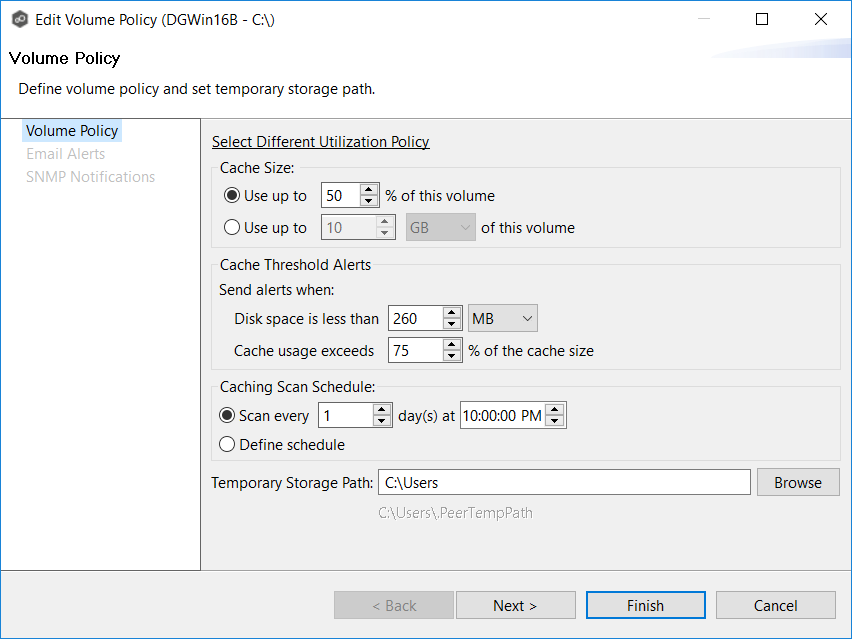
8.If you want to associate a different utilization policy with this volume policy, click Select Different Utilization Policy link, select the policy, and then click OK.
9.In the Cache Size section, choose an option for setting the cache size.
•Use up to X % of this volume
•Use up to X size of this volume
10.In the Cache Threshold Alerts section, enter values for automatic alerts about free disk space and cache usage.
Peer Management Center will automatically display alerts in the Alerts tab and send alerts via email (if configured) when:
•The amount of free disk space on the volume falls below the specified value. For example, if a 1TB volume has 500MB of free space and the threshold is set to 512MB, an alert will be sent.
•Cache usage on the volume exceeds the specified percentage of the cache size. For example, if the cache size is set to 80%, equating to to 750 GB, DSU will start sending alerts when it has used 600 GB.
11.In the Caching Scan Schedule, set the frequency that the volume should be scanned to optimize the balance of fully hydrated vs stubbed files.
This scan can be run daily at a specified time or you can define a more customized schedule.
12.In the Temporary Storage Path field, enter a path or browse to the location you want to be used as temporary storage space.
The temporary storage space will be used to store the content of stub files as they are are being rehydrated. The content of files undergoing rehydration are referred to as file blocks. File blocks are fixed-length chunks of data that are read into memory when requested by an application. DSU will create a subfolder named .PeerTempPath under the location that you specify and temporarily store the file blocks in that subfolder.
For optimal performance, we recommend that the temporary storage space be on the same volume as the watch set. If that is not possible, it should be on a high performance disk.
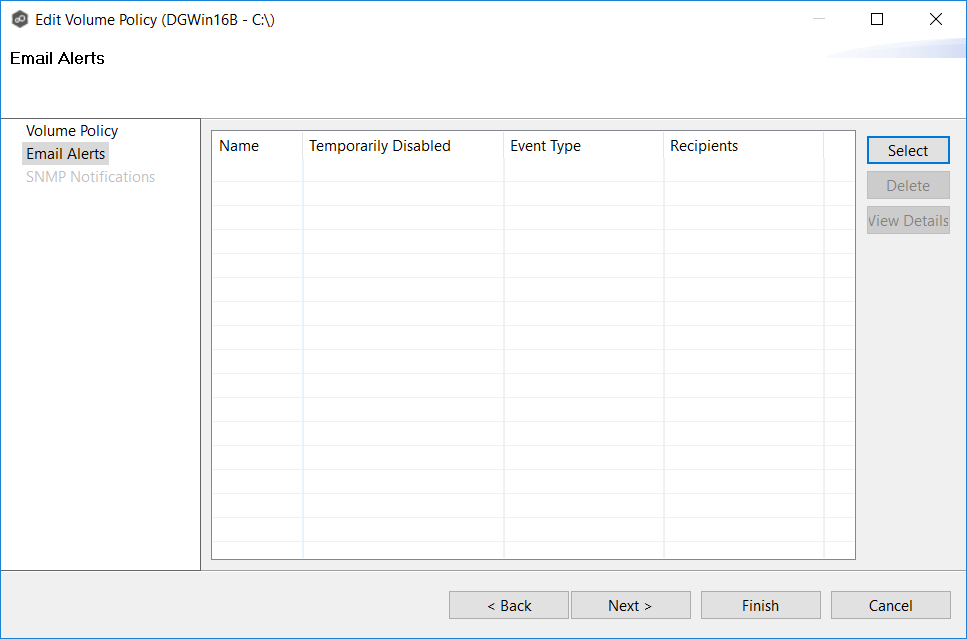
13.(Optional) Select one or more email alerts to be associated with this volume policy, and then click Next.
14.(Optional) Select one or more SNMP notifications to be associated with this volume policy.
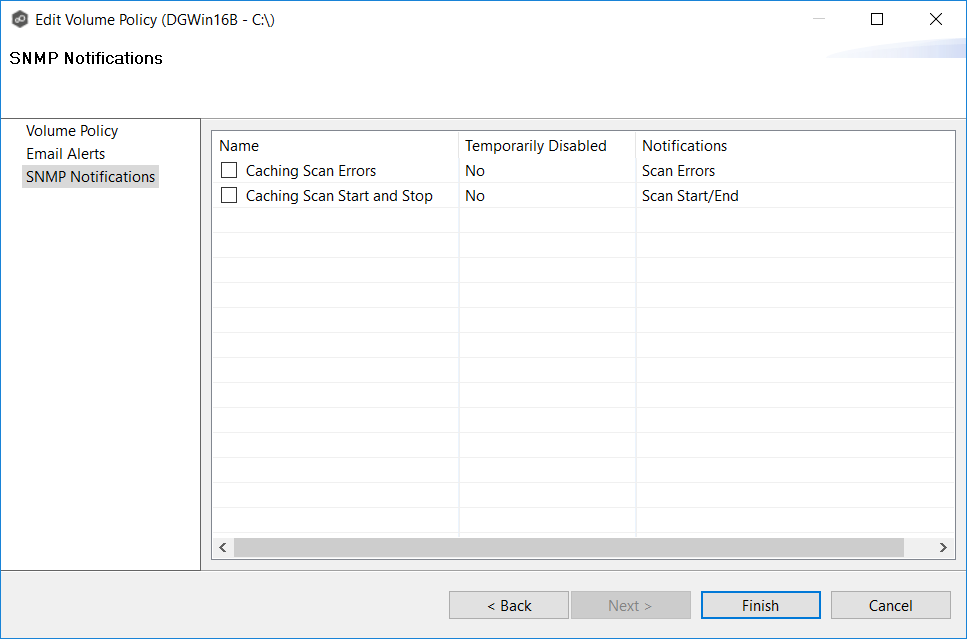
15.Click Finish.
The following message is displayed:
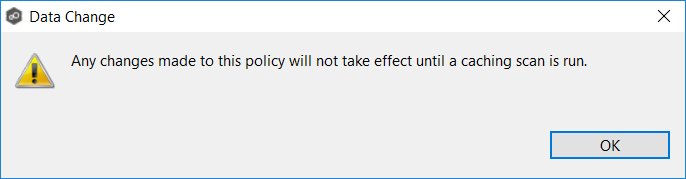
16.Click OK.
The revised volume policy is listed in the Volume Policies table. It will be used after jobs using the policy are restarted.
17.Click Apply and Close or Apply.