1.Select New Container to create a new container or select Existing Container.
Choose Existing Container if:
•You (or someone else) already created a container you want to use.
•You want to use a container that was created outside the PMC.
•You don't have the permissions required to create a new container and want to use one that someone else will create.
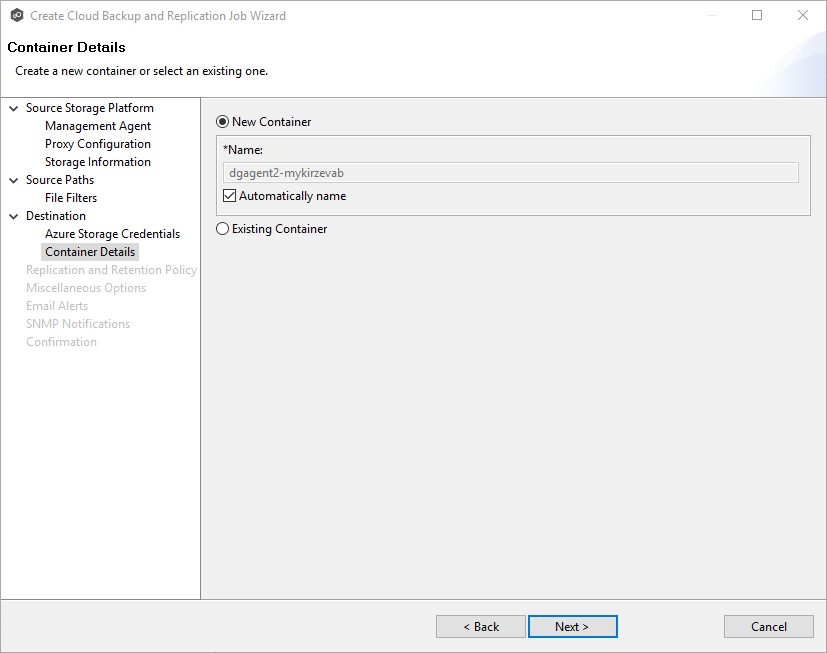
2.If you selected Existing Container, select a container from the drop-down list. If the container does not appear in the list because the person who has the permissions to crate a container has not yet created the bucket, click the Reload button after the container is created. The container will appear in the updated list.
If you selected New Container, you have two options. By default, the Automatically name checkbox is selected. You can deselect the checkbox and enter a name for the container; the container name must conform to the following naming rules:
•A container name must be unique.
•A container name must be a valid DNS name.
•A container name must start with a letter or number, and can contain only letters, numbers, and the dash (-) character.
•Every dash (-) character must be immediately preceded and followed by a letter or number; consecutive dashes are not permitted in container names.
•All letters in a container name must be lowercase.
•A container name must be from 3 through 63 characters long.
For more information about container names, see Naming and referencing containers, blobs, and metadata.
3.Click Next.
The Replication and Retention Policy page appears.