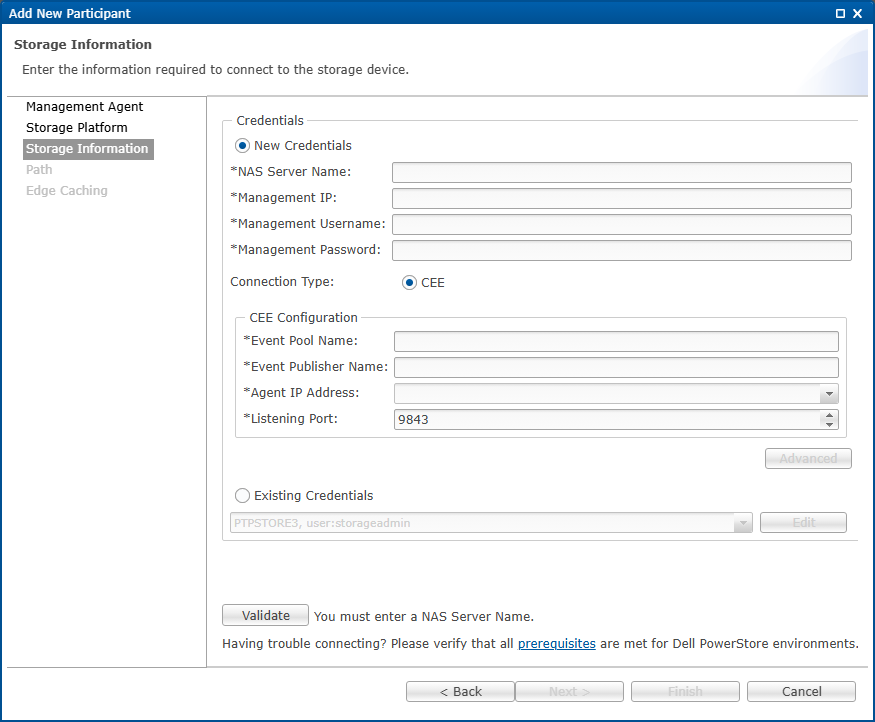
To connect to the Dell PowerStore NAS server hosting the data to be replicated:
1.If you have selected New Credentials, enter the required connection detail in the Credentials section.
Field |
Description |
|---|---|
NAS Server Name |
Enter the name of the PowerStore server hosting the data to be replicated. |
Management IP |
Enter the IP address for accessing the REST-based API integrated into the PowerStore server. |
Management Username |
Enter the user name for the account managing the PowerStore server. |
Management Password |
Enter the password for account managing the PowerStore server. |
Connection Type |
Select the method for sending real-time event notifications to the Agent: •CEE: Choose if you are using the CEE framework to dispatch notifications to the Agent. |
2.Enter the required values in the CEE Configuration section.
Field Description |
Description |
|---|---|
Event Pool Name |
Enter the exact name of the event pool on the PowerStore device that publishes CEE notifications. You can find this name in the PowerStore Manager UI under Event Notifications. |
Event Publisher Name |
Enter the exact name or ID of the event publisher on the PowerStore device that sends CEE notifications to the Agent. You can find this value in the PowerStore Manager UI under Event Notifications. |
Agent IP Address |
Select the IP address of the server hosting the Agent that will receive real-time event notifications for the PowerStore device. The device must be able to route traffic to this address. If the desired IP address is not listed, enter the address manually. |
Listening Port |
Enter the TCP port through which the Agent will receive real-time event notifications from CEE. |
3.Click Advanced if you want to set advanced options.
4.Click Validate to test the credentials. If validation is successful, a confirmation message appears.
5.Click Next to proceed to the Path page.