Peer Management Center supports the ability to include content from CIFS/SMB shares on one or more Nutanix Files (formerly Acropolis File Services or AFS) clusters within most available job types. For detailed information about Nutanix prerequisites, see Nutanix Prerequisites.
To create a new Nutanix configuration:
1.Select Preferences from the Window menu.
The Preferences dialog appears.
2.Select NAS Configuration in the navigation tree.
3.Select Nutanix Configurations.
The Nutanix Files Configurations page is displayed. It lists existing configurations.
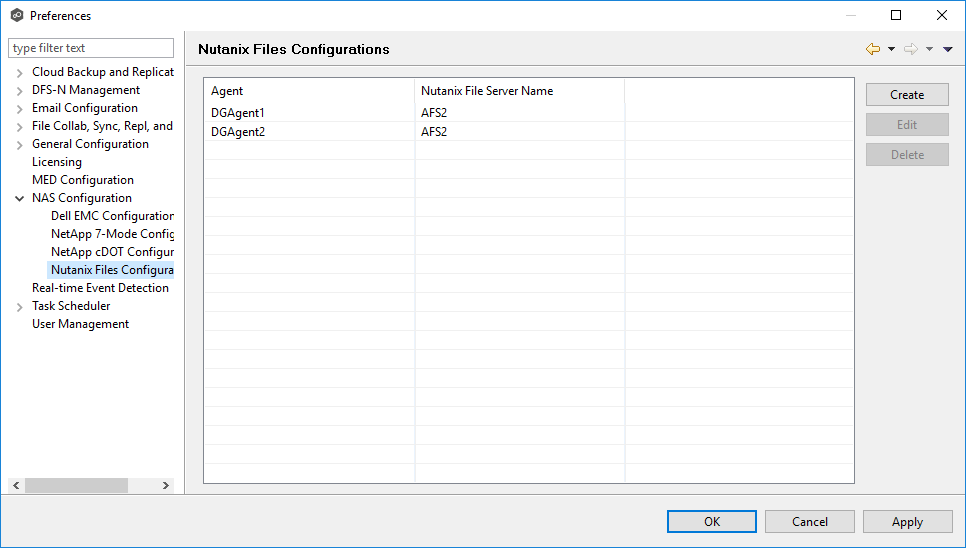
4.Click the Create button.
The Management Agent page appears.
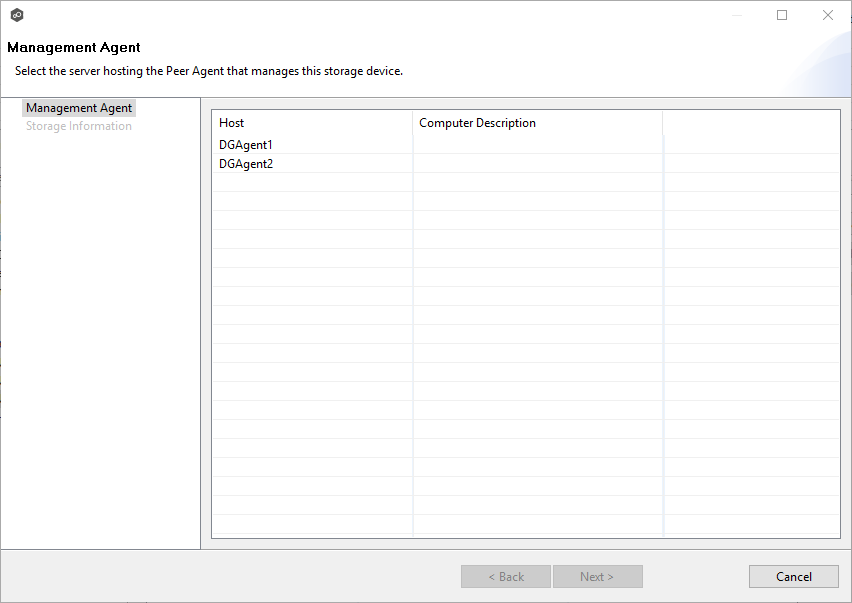
5.Select a Management Agent, and then click Next.
The Storage Information page appears.
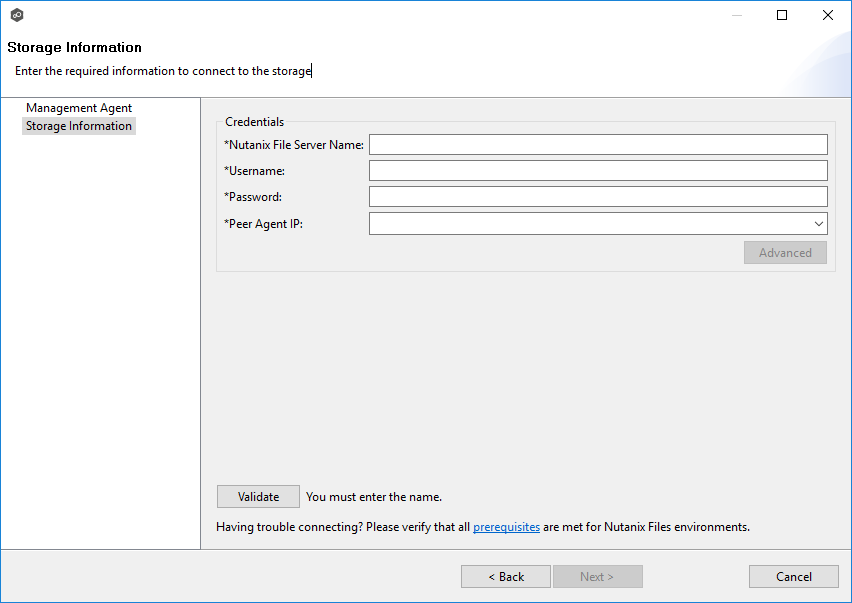
6.Enter the required values in Credentials.
Nutanix File Server Name |
Enter the name of the Nutanix Files cluster hosting the data to be replicated. |
Username |
Enter the user name for the account managing the Nutanix Files cluster via its management APIs. |
Password |
Enter the password for the account managing the Nutanix Files cluster via its management APIs. |
Peer Agent IP |
Select the IP address of the server hosting the Agent that manages the Nutanix Files cluster. The Files cluster must be able to route traffic to this IP address. If the IP address you want does not appear, manually enter the address. This should not point to the Files cluster itself. |
7.(Optional) Click the Advanced button if you want to specify advanced options, and then enter the required values:
Nutanix Files Advanced Options
8.Click Validate.
9.Click Next.
10.Click OK.