Create a new file synchronization job by clicking the Create New button in the toolbar of the Peer Management Center, or by selecting the New menu item from the File menu. A drop down list of all installed Peerlet types will be displayed. Selecting the File Synchronization option will open the File Synchronization Configuration dialog.
The first page of configuration will be for general information such as Host Participants and Job name tag.
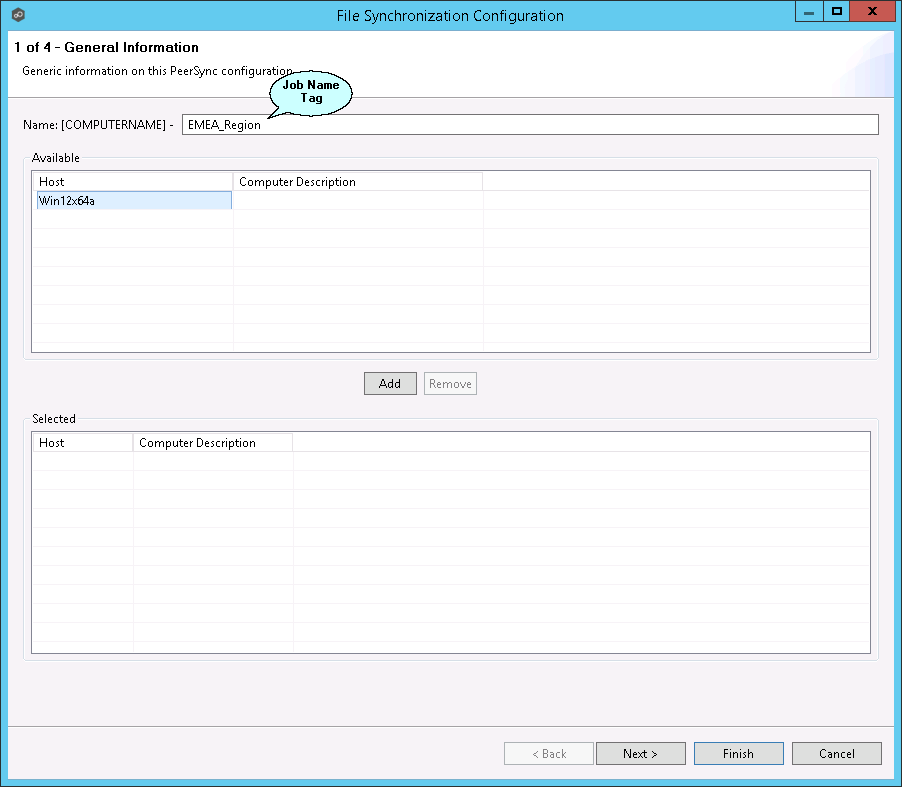
| 1. | The job name will default to the computer name of the host participant. If you wish to group your computers ,you can optionally add a name tag in the text box next to the job name (e.g., East Coast, EMEA, Region2). This will help in filtering machines by their given tag. |
| 2. | A list of all available hosts that have not yet been configured with a PeerSync installation, will appear in the Available table on the top of the page. Available hosts are any host with a Peer Agent installed that has successfully connected to the configured Peer Management Center Broker. The name that will be displayed is the computer name of the server that the Peer Agent is running on. If a particular host is not displayed in the list, then try restarting the Peer Agent Windows Service on that host, and if it successfully connects to the Peer Management Center Broker, then the list will be updated with the computer name of that host. |
Note: Computer Description is defined through Windows on a per-computer basis.
| 3. | Select one or more hosts from the Available table and click the Add button to add the hosts to the Selected table. These are the hosts you wish to deploy the PeerSync configuration and installation to. |