|
<< Click to Display Table of Contents >> Step 8 - Logging and Alerts |
  
|
|
<< Click to Display Table of Contents >> Step 8 - Logging and Alerts |
  
|
File Event Logging
Various types of file collaboration events can be written to a log file and to the Event Log tab located within the File Collaboration Runtime View for the selected file collaboration job. Each job will log to the fc_event.log file located in the 'Hub\logs' subdirectory within the Peer Management Center installation directory. All log files are stored in a tab delimited format that can easily be read by Microsoft Excel or other Database applications.
Log Entry Severity Levels
Informational |
Informational log entry, e.g. File was opened. |
Warning |
Some sort of warning occurred that did not produce an error, but was unexpected or may need further investigation. |
Error |
An error occurred performing some type of file activity. |
Fatal |
A fatal error occurred that caused a host to be taken out of the session, a file to be quarantined, or a session to become invalid. |
Configuration
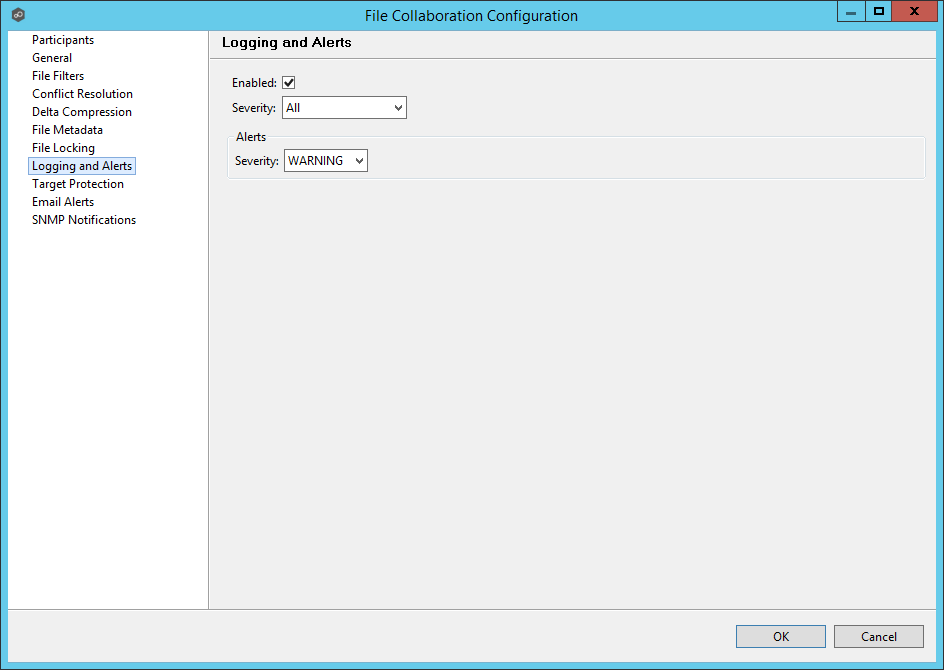
By default, all file collaboration activity is logged for all severity levels. You can enable or disable file event logging as well as select the level of granularity on what to log through the Logging and Alerts page, available by selecting Logging and Alerts from the tree node within the File Collaboration Configuration dialog.

Below is a list of logging fields and their descriptions:
Enabled |
Checking this option will enable file event logging based on the other settings. Un-checking this option will completely disable all logging. |
||||
Severity |
Determines what severity levels will be logged. There are two options:
|
||||
Event Types |
If checked, the corresponding event type will be logged. |
||||
File Open |
A file was opened by a remote application on a Source Host. |
||||
File Lock |
A file lock was acquired on a Target Host by the file collaboration job. |
||||
File Close |
A file was closed. |
||||
File Add |
A file was added to the Watch Set. |
||||
File Modify |
A file was modified in the Watch Set. |
||||
File Delete |
A file was deleted. |
||||
File Rename |
A file was renamed. |
||||
Attribute Change |
A file attribute was changed. |
||||
Security (ACL) Change |
The security descriptor of a file or folder was changed. |
||||
Directory Scan |
Indicates when a directory was scanned as a result of the initial synchronization process. |
||||
File ADS Transfer |
The Alternate Data Stream of a modified file was synced to target host(s). |
Alerts
Configured in the screen shown above, various types of alerts will be logged to a log file and to the Alerts table located within the File Collaboration Runtime View for the selected job. Each file collaboration job will log to the fc_alert.log file located in the 'Hub\logs' subdirectory within the Peer Management Center installation directory. All log files are stored in a tab delimited format that can easily be read by Microsoft Excel or other database applications.
The default log level is WARNING which will show any warning or error alerts that occur during a running session. Depending on the severity of the alert, the session may need to be restarted.
Once all Logging and Alerts settings are set, you can either save the configuration and exit the dialog, or you can continue with the configuration process by going to Step 8 - Target Protection.